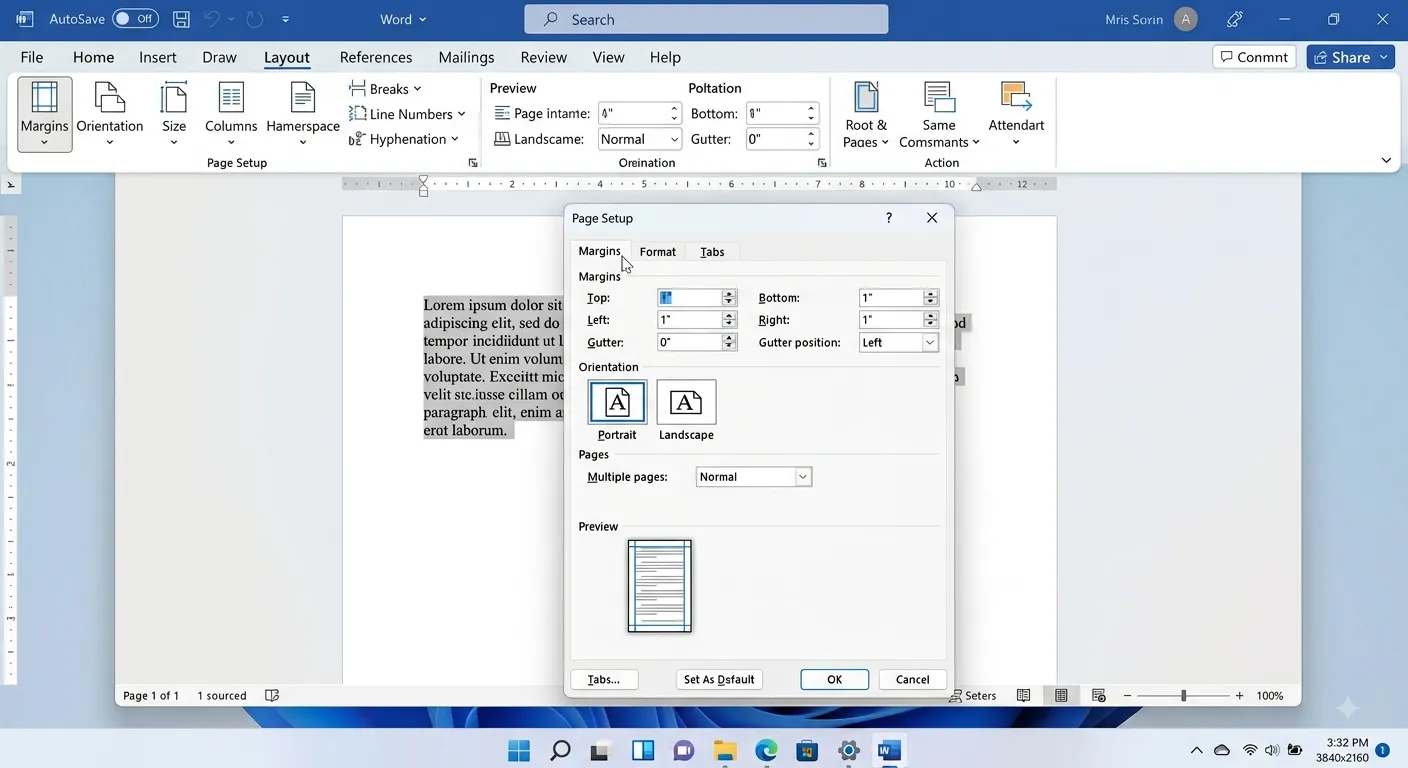
Page Setup
Page Setup is one of the most important features in Microsoft Word. It controls the overall appearance of a document before printing by allowing users to adjust page margins, orientation, paper size, columns, page breaks and other layout settings. Proper Page Setup ensures that documents look professional, well-organized and suitable for assignments, reports, resumes, books and business documents.
What is Page Setup?
Page Setup refers to configuring the layout of a document before printing or sharing. It defines how text and objects are arranged on a page. Microsoft Word provides all Page Setup tools under the Layout tab.
Margins
Adjust space between document content and page edges.
Orientation
Choose Portrait or Landscape page layout.
Paper Size
Select A4, Letter, Legal and other paper sizes.
Columns
Arrange text into newspaper-style columns.
Page Breaks
Start content from a new page whenever required.
Section Breaks
Apply different layouts within the same document.
Page Margins
Margins are the blank spaces between the document content and the edges of the paper. Correct margins improve readability and ensure proper printing.
| Margin Type | Description | Default Value |
|---|---|---|
| Top | Space between the top edge and document content. | 1 inch |
| Bottom | Space between the bottom edge and document content. | 1 inch |
| Left | Space between the left edge and document content. | 1 inch |
| Right | Space between the right edge and document content. | 1 inch |
| Gutter | Extra margin added for binding documents. | Optional |
Page Orientation
Page Orientation determines the direction in which the page is displayed and printed. Microsoft Word provides two orientation options depending on the type of document.
Portrait
Vertical page layout. Best for letters, assignments, reports and books.
Landscape
Horizontal page layout. Best for tables, charts, certificates and wide images.
| Orientation | Best Used For |
|---|---|
| Portrait | Assignments, Books, Letters, Reports |
| Landscape | Tables, Certificates, Brochures, Large Images |
Paper Size
Microsoft Word allows users to choose different paper sizes according to the printing requirement. Selecting the correct paper size ensures that documents print correctly without clipping or scaling issues.
| Paper Size | Dimensions | Common Use |
|---|---|---|
| A4 | 210 × 297 mm | Assignments and Office Documents |
| Letter | 8.5 × 11 in | Business Documents |
| Legal | 8.5 × 14 in | Legal Papers |
| A3 | 297 × 420 mm | Posters and Large Drawings |
| A5 | 148 × 210 mm | Booklets and Notes |
Columns
The Columns feature divides text into multiple vertical sections, giving the document a newspaper-style appearance. It is commonly used in newsletters, magazines, brochures and journals.
One Column
Default layout used for most documents.
Two Columns
Ideal for newsletters and magazines.
Three Columns
Useful for brochures and information leaflets.
More Columns
Create custom column widths and spacing.
| Column Type | Purpose |
|---|---|
| One | Books, Reports and Assignments |
| Two | Newspapers and Newsletters |
| Three | Brochures and Flyers |
| Custom | Professional Publishing Layouts |
Page Breaks
A Page Break forces Microsoft Word to start the following content on a new page. It is much better than pressing the Enter key multiple times because it keeps the document properly formatted.
- Starts content on a new page.
- Keeps document formatting consistent.
- Useful for reports, books and projects.
- Automatically adjusts when content changes.
- Can be inserted from the Layout or Insert tab.
1. Place the cursor where the new page should begin.

2. Open the Insert tab.

3. Click Page Break.

OR

Press Ctrl + Enter.

4. The next content starts on a new page.
Section Breaks
Section Breaks divide a document into separate sections so that each section can have its own page layout, margins, orientation, headers, footers and page numbering.
Next Page
Starts a new section on the next page.
Continuous
Starts a new section without creating a new page.
Even Page
Begins the new section on the next even-numbered page.
Odd Page
Begins the new section on the next odd-numbered page.
| Section Break | Description | Use Case |
|---|---|---|
| Next Page | Starts a new section on the next page. | New Chapter |
| Continuous | Creates a new section on the same page. | Different Columns |
| Even Page | Starts on the next even-numbered page. | Books |
| Odd Page | Starts on the next odd-numbered page. | Professional Printing |
Headers and Footers
Headers and Footers are areas at the top and bottom of each page where you can place repeated information such as document titles, page numbers, dates, author names and company logos.
Header
Appears at the top of every page.
Footer
Appears at the bottom of every page.
Page Numbers
Automatically number document pages.
Date & Time
Insert the current date and time automatically.
1. Open the Layout tab.

2. Click Margins and select a margin size.

3. Choose Orientation.

4. Select the required Paper Size.

5. Configure Columns if necessary.

6. Insert Page Breaks.

7. Add Section Breaks.

8. Save the document.
Practical Examples
Open Layout Tab

→ Orientation

→ Landscape

Click OK

The page is now displayed in Landscape mode.
Layout Tab

→ Margins

→ Custom Margins

Top : 1"

Bottom : 1"

Left : 1.5"

Right : 1"

Click OK
Select the text

Open Layout Tab

Click Columns

Choose Two

The selected text is displayed
in two newspaper-style columns.
Page Setup Keyboard Shortcuts
| Shortcut | Function |
|---|---|
| Ctrl + Enter | Insert Page Break |
| Alt + P | Open Layout Tab |
| Alt + P + M | Margins |
| Alt + P + O | Orientation |
| Alt + P + S | Paper Size |
| Alt + P + C | Columns |
| Alt + Shift + D | Insert Current Date |
| Alt + Shift + T | Insert Current Time |
Best Practices
- Use A4 paper size for most academic and office documents.
- Keep margins consistent throughout the document.
- Choose Portrait orientation for normal documents.
- Use Landscape orientation only when required.
- Insert Page Breaks instead of pressing Enter repeatedly.
- Use Section Breaks to apply different layouts.
- Preview the document before printing.
- Save your document after changing Page Setup options.
- Use Print Preview to check the final layout.
- Maintain a professional and balanced page design.
Conclusion
Page Setup is one of the most essential features of Microsoft Word because it controls the appearance of every printed document. By properly setting margins, orientation, paper size, columns, page breaks and section breaks, users can create professional-quality documents suitable for schools, colleges, businesses and offices. Regular practice with Page Setup tools will help you prepare clean, attractive and print-ready documents efficiently.