Mail Merge
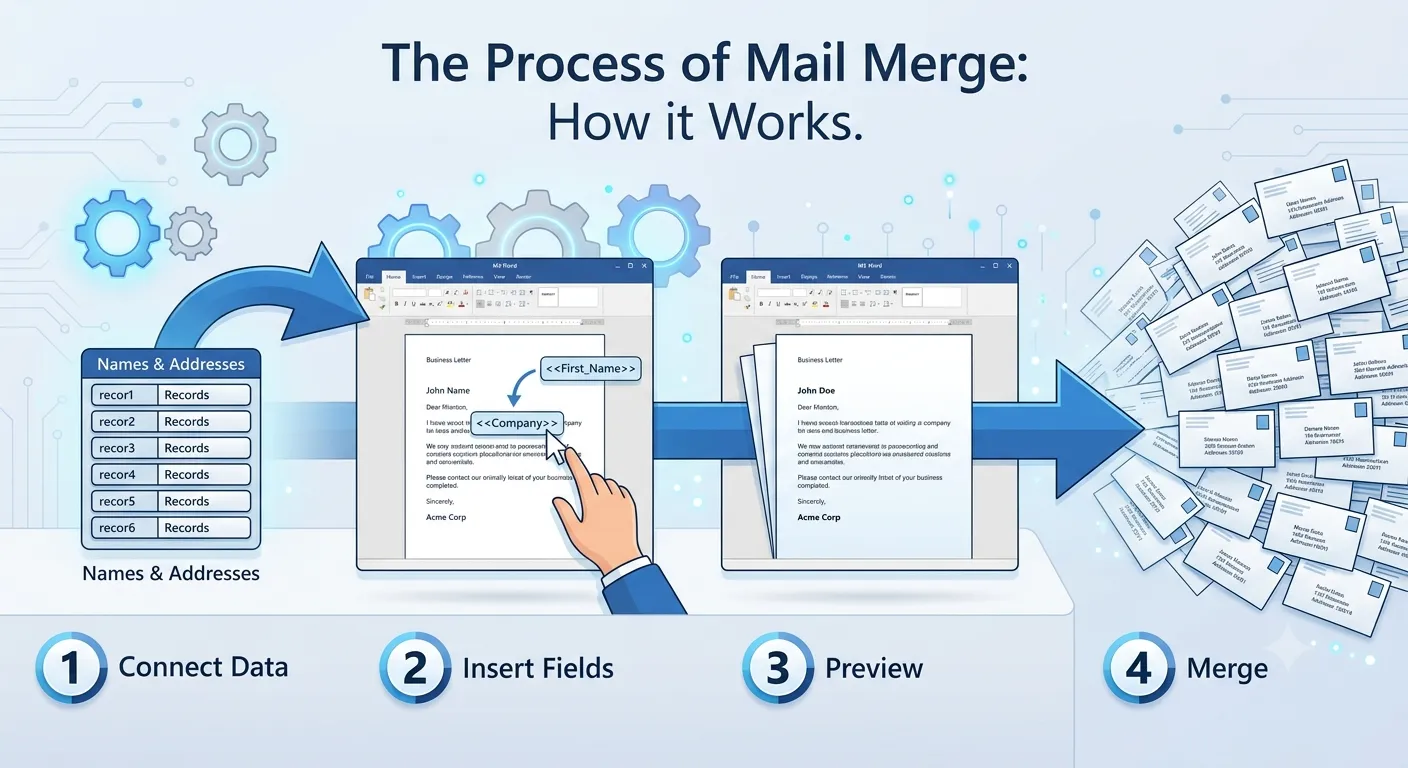
Mail Merge is one of the most powerful features in Microsoft Word. It allows users to create personalized letters, emails, envelopes, labels and certificates for many recipients automatically by combining a main document with a data source such as an Excel spreadsheet or contact list.
What is Mail Merge?
Mail Merge combines two parts: a Main Document and a Data Source. The main document contains the common content, while the data source stores recipient information such as names, addresses, phone numbers or email addresses. Microsoft Word automatically creates a personalized copy for each recipient.
Main Document
Contains the common text shared by every recipient.
Data Source
Stores recipient details like names and addresses.
Automatic Merge
Creates personalized documents within seconds.
Professional Use
Ideal for offices, schools, businesses and organizations.
Components of Mail Merge
Every Mail Merge process requires several important components that work together to generate personalized documents automatically.
| Component | Purpose |
|---|---|
| Main Document | Contains the fixed content for every copy. |
| Data Source | Stores recipient information. |
| Merge Fields | Insert personalized information from the data source. |
| Recipients | People who receive the merged documents. |
| Merged Document | The final personalized output. |
1. Open the Mailings
tab.

2. Click Start Mail
Merge.

3. Select the document
type.

4. Choose Recipients.

5. Insert Merge
Fields.

6. Preview Results.

7. Finish & Merge.
Types of Mail Merge Documents
Microsoft Word supports different Mail Merge document types depending on the purpose. Each type is designed to automate the creation of personalized documents for multiple recipients.
Letters
Create personalized letters for many recipients.
E-mail Messages
Send customized emails to multiple contacts.
Labels
Generate mailing labels automatically.
Envelopes
Create envelopes with recipient addresses.
| Document Type | Purpose |
|---|---|
| Letters | Create personalized business or personal letters. |
| E-mail Messages | Send customized emails to recipients. |
| Envelopes | Print recipient addresses on envelopes. |
| Labels | Create mailing labels for packages and letters. |
| Directory | Create a combined list of all recipient records. |
1. Open the Mailings
tab.

2. Click Select
Recipients.

3. Choose Use an
Existing List.

4. Browse and select
the data file.

5. Click Open.

6. Confirm the
recipient list.
Data Sources for Mail Merge
Microsoft Word can connect to different types of data sources. The data source contains recipient information that is inserted automatically into the main document during the merge process.
Excel Sheet
Import recipient data from Microsoft Excel worksheets.
Outlook Contacts
Use contacts stored in Microsoft Outlook.
Word Table
Use a table created inside a Word document.
Access Database
Connect to Microsoft Access database records.
| Data Source | Description |
|---|---|
| Excel Workbook | Most commonly used source for recipient information. |
| Outlook Contacts | Uses stored email and contact information. |
| Word Table | Recipient data stored in a Word table. |
| Access Database | Imports records from Microsoft Access. |
| CSV File | Uses comma-separated values files. |
Merge Fields
Merge Fields are placeholders inserted into the main document. During Mail Merge, Microsoft Word replaces these placeholders with actual information from the selected data source for each recipient.
First Name
Insert the recipient's first name automatically.
Last Name
Insert the recipient's surname from the data source.
Address
Insert complete mailing addresses into the document.
Insert recipient email addresses automatically.
| Merge Field | Purpose |
|---|---|
| First Name | Displays the recipient's first name. |
| Last Name | Displays the recipient's surname. |
| Address | Shows the recipient's mailing address. |
| City | Displays the city name. |
| Displays the recipient's email address. |
1. Place the cursor.

2. Open the Mailings
tab.

3. Click Insert Merge
Field.

4. Choose the desired
field.

5. Repeat for all
required fields.

6. Save the document.
Preview Results
The Preview Results feature allows users to view how each personalized document will appear before completing the Mail Merge. This helps identify missing information or formatting errors before printing or sending the documents.
Preview Records
View each personalized document before completing the merge.
Next Record
Move to the next recipient in the recipient list.
Previous Record
Return to the previous recipient for verification.
Verify Data
Check names, addresses and merge fields before finishing.
| Preview Option | Purpose |
|---|---|
| Preview Results | Display personalized information before merging. |
| First Record | View the first recipient's document. |
| Next Record | Move to the next recipient. |
| Previous Record | Return to the previous recipient. |
| Find Recipient | Locate a specific recipient in the list. |
1. Open the Mailings
tab.

2. Click Preview
Results.

3. Use Next Record
or Previous Record.

4. Verify all merged
information.

5. Continue until
all records are
checked.
Finish & Merge
After verifying all recipient information, the Finish & Merge command creates the final personalized documents. Users can print the merged documents, edit individual copies or send personalized email messages directly.
Print Documents
Print all personalized documents after the merge.
Edit Documents
Create editable merged documents for further changes.
Send E-mails
Deliver personalized email messages directly to recipients.
Complete Merge
Generate personalized documents automatically.
| Finish Option | Purpose |
|---|---|
| Edit Individual Documents | Create editable merged documents. |
| Print Documents | Print personalized documents directly. |
| Send E-mail Messages | Send merged emails to recipients. |
| All Records | Merge every recipient in the list. |
| Selected Records | Merge only selected recipients. |
1. Click Finish &
Merge.

2. Choose the desired
option.

3. Select All Records
or Selected Records.

4. Click OK.

5. Save or Print the
merged documents.
Practical Examples
Main Document:

Dear
«First_Name»,

Welcome to our
organization.

Finish & Merge.
Recipient:

Rahul Sharma

Address:

21 Park Street
Kolkata

Merge to Labels.
Recipient:

«Email»

Subject:

Course Update

Finish &
Merge →

Send Email
Messages.
Mail Merge Keyboard Shortcuts
| Shortcut | Function |
|---|---|
| Alt + M | Open the Mailings tab. |
| Ctrl + P | Print merged documents. |
| Ctrl + S | Save the current document. |
| Ctrl + Z | Undo the previous action. |
| Ctrl + A | Select the entire document. |
| F12 | Open the Save As dialog box. |
| Esc | Close the current dialog box. |
Best Practices
- Keep the data source accurate and up to date before starting Mail Merge.
- Always preview the merged documents before printing or sending emails.
- Use meaningful field names such as First Name, Last Name and Address.
- Save both the main document and the data source regularly.
- Check for missing or blank recipient information before merging.
- Use filters to merge documents only for selected recipients when needed.
- Verify email addresses before sending merged email messages.
- Use Merge Fields instead of typing recipient information manually.
- Test the merge with a few records before processing the complete list.
- Keep confidential recipient information secure and protected.
Conclusion
Mail Merge is one of the most efficient automation features in Microsoft Word. It allows users to create personalized letters, emails, envelopes and labels by combining a main document with a data source. Features such as Merge Fields, Preview Results and Finish & Merge help generate professional documents quickly while reducing manual work and minimizing errors. By mastering Mail Merge, users can save time, improve productivity and efficiently manage communication with large numbers of recipients in schools, businesses and organizations.